Performing a Jailbreak with Palera1n in six steps!
- Published on
Post Date
- Authors

- Name
- Juan Urbano Stordeur
- X
- @juanurss

TL;DR: Do you need to make a Jailbreak for newer iOS devices and versions? You are in the right place! This article will help you to make a JB for 15.X to 16.X version, and we will cover some classical issues performed when you make a Palera1n JB.
TL;DR2: The Just Mobile Security Team is glad to write about this, because, if you need to test an iOS application, having jailbroken access makes our life easier :)
Palera1n
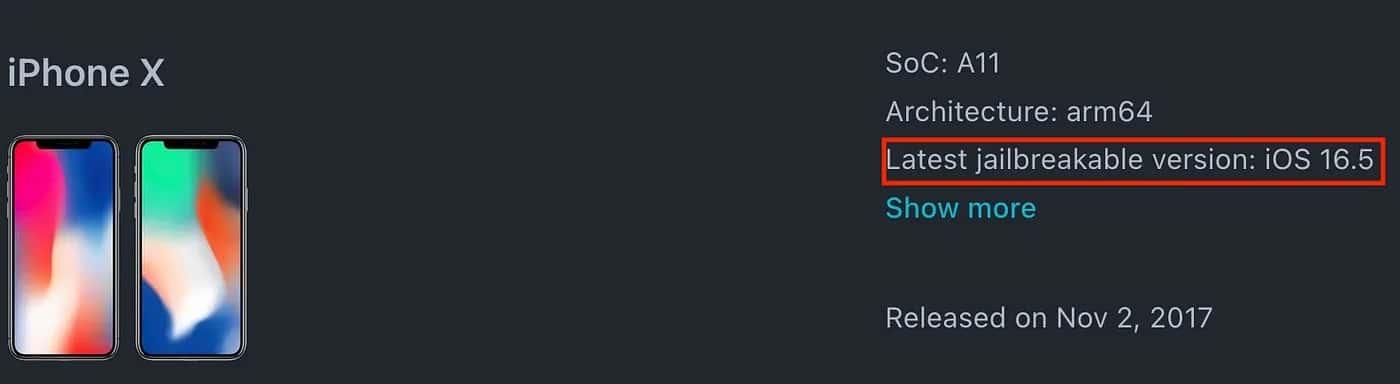
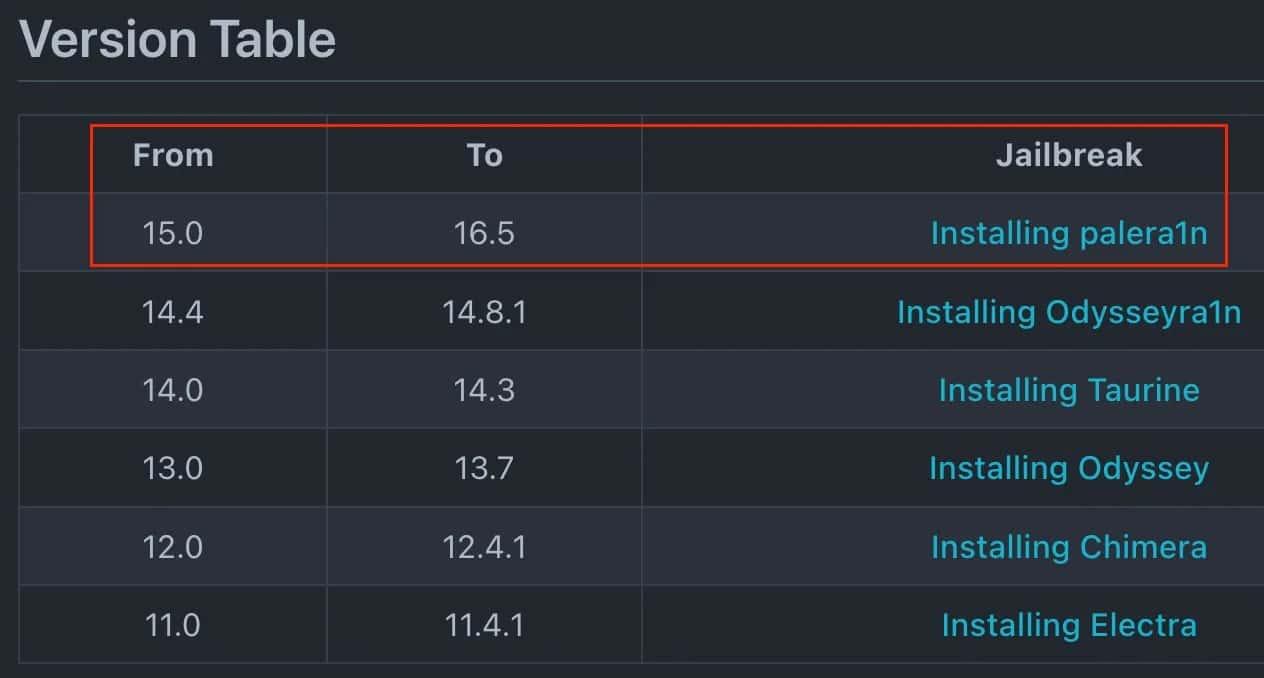
Palera1n is a typeof Jailbreak (there are different JB, this kind of JB is the semi-tethered JB). Before we start with JB we need to check if our device is supported by palera1n JB. In the following link, you can see all the supported devices
We will use our iPhone X, as it is the best option for palera1n Jailbreak. This is because it can go from 15.X to 16.X:
After checking that! We are ready to start :)
Starting with the Jailbreak!
Step #1:
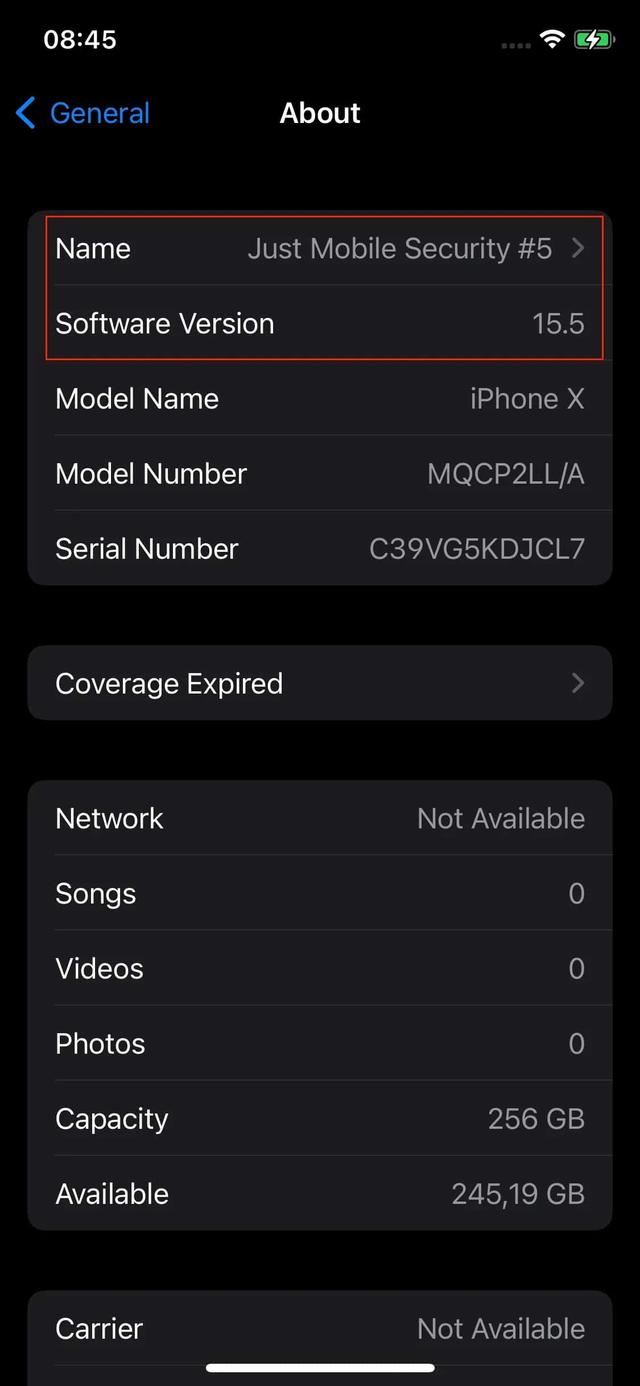
The first step is checking if your device is working with the latest Palera1n jailbreak. You need to go to Settings -> General and check the Software Version.
Step #2:
Once you have checked the version, you need to download palera1n from the official website and click on Get Started. I’ll show the installation process over MacOSX.

From the official site, the steps are:
1. MacOS users should generally get palera1n-macos-universal
2. Enable Full Disk Access for Terminal (this only has to be done once)
macOS Ventura and above: System Settings → Privacy & Security → Full Disk Access
3. If Terminal does not show up in the list, click the plus icon and select it from Applications → Utilities. (this only has to be done once):
4. Open a terminal window and cd to the directory that palera1n was downloaded to (usually cd ~/Downloads).
5. Run sudo mkdir -p /usr/local/bin
6. Run sudo mv ./palera1n-macos-universal /usr/local/bin/palera1n
7. Replace ./palera1n-macos-universal with whatever version you downloaded
8. Run sudo xattr -c /usr/local/bin/palera1n
9. Run sudo chmod +x /usr/local/bin/palera1n
For this device (Iphone X), we need to follow a few additional steps:
On A11 devices, you must disable your passcode and will not be able to
use your passcode, or other SEP functionality, until you boot into a stock iOS
state. SEP functionality includes things such as a passcode, Face ID/Touch ID,
and Apple Pay
Basically, you must disable your passcode, which means that you won’t be able to use it or access other SEP functions. You will not be able to use your passcode, or other SEP functionality if you want to make the JB.
Step #3:
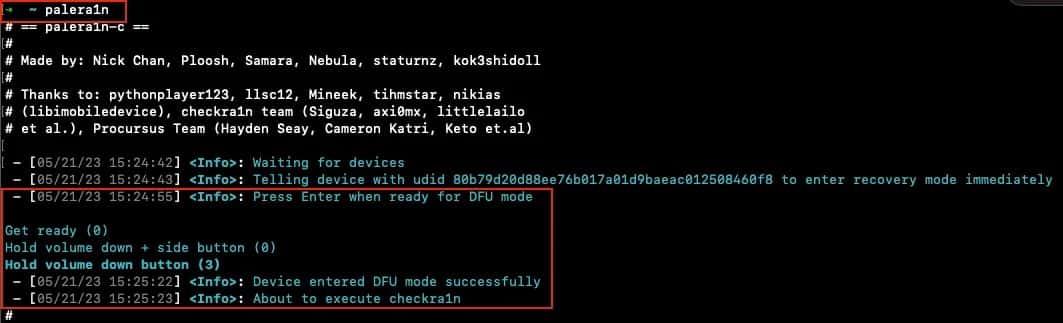
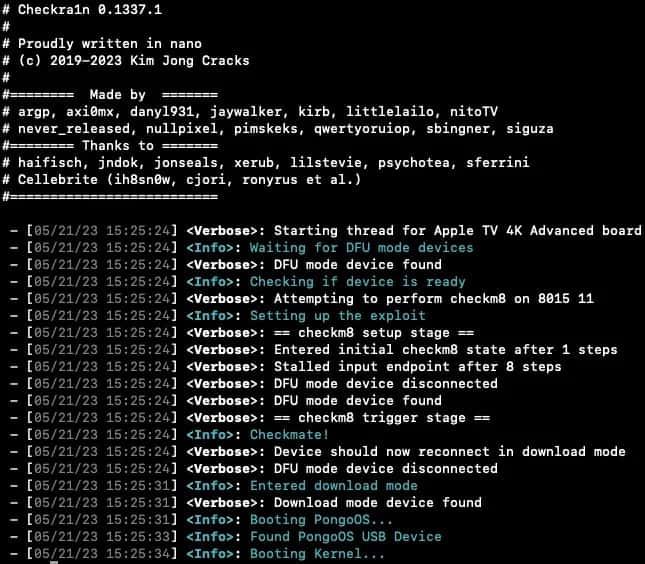
Run palera1n from your console with your device connected, if the device is recognized it will ask you to “Press Enter when ready for DFU Mode’’ (be ready to press the device buttons).
Step #4: Jailbreak process running
You need to wait for some minutes (less 2 minutes).

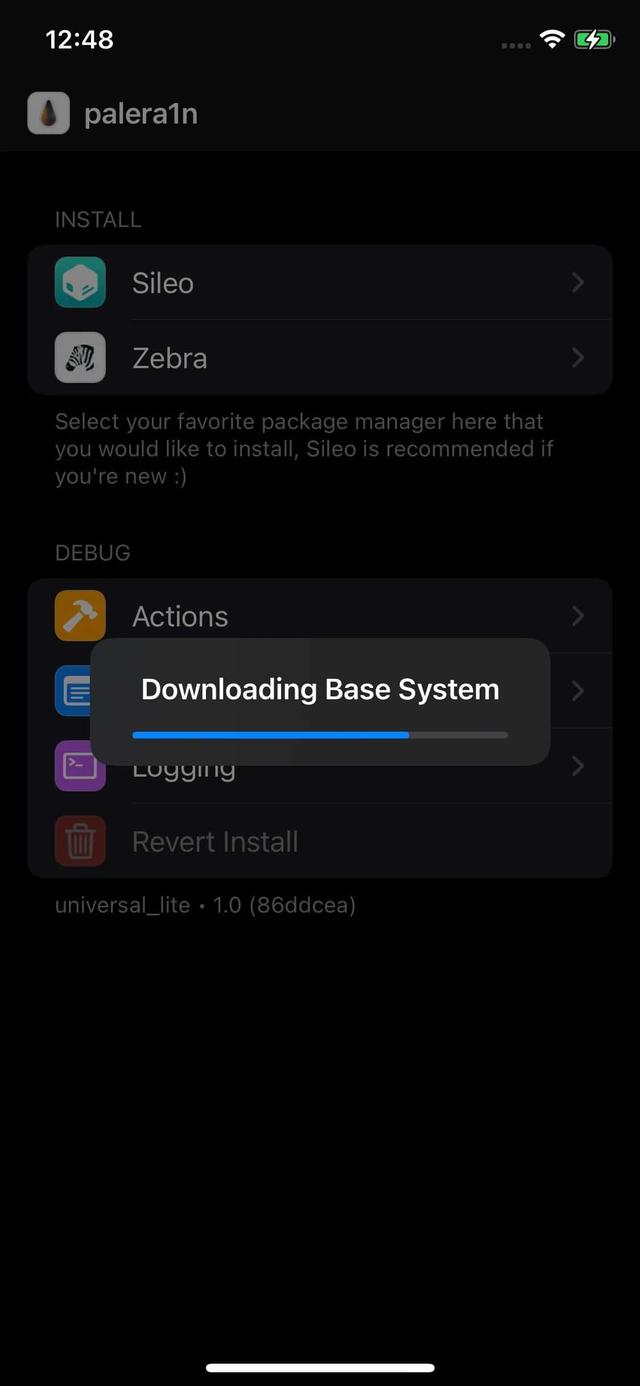
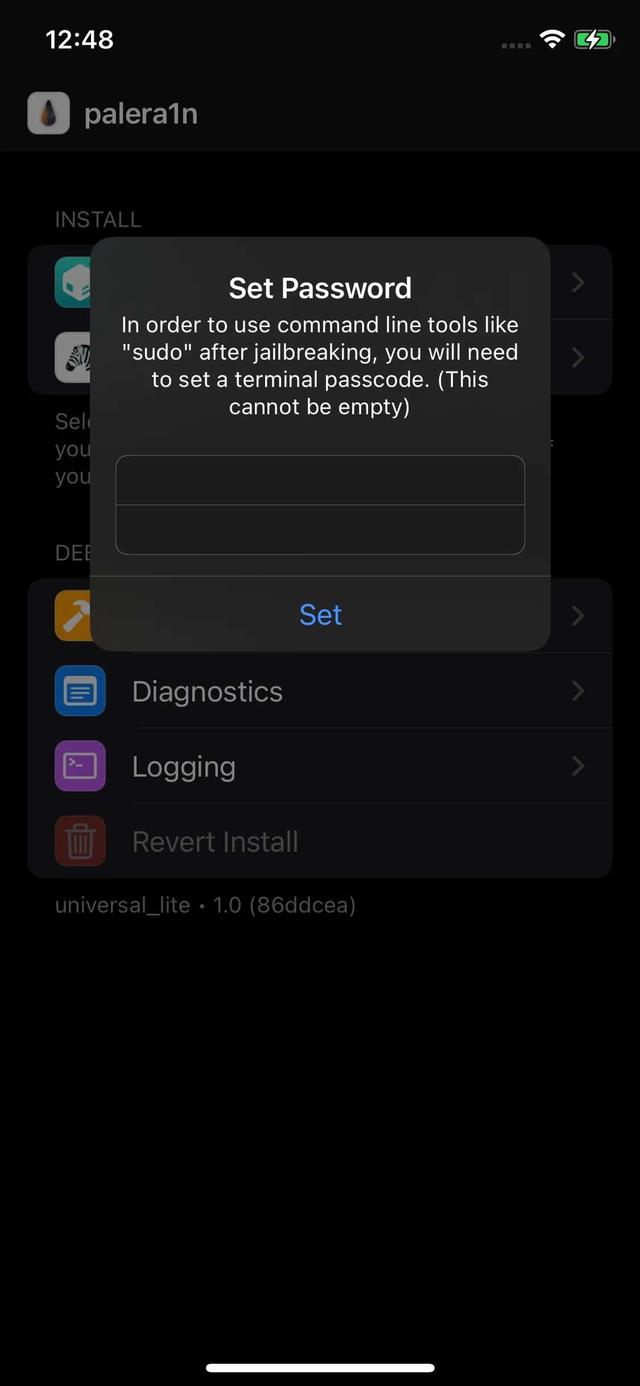
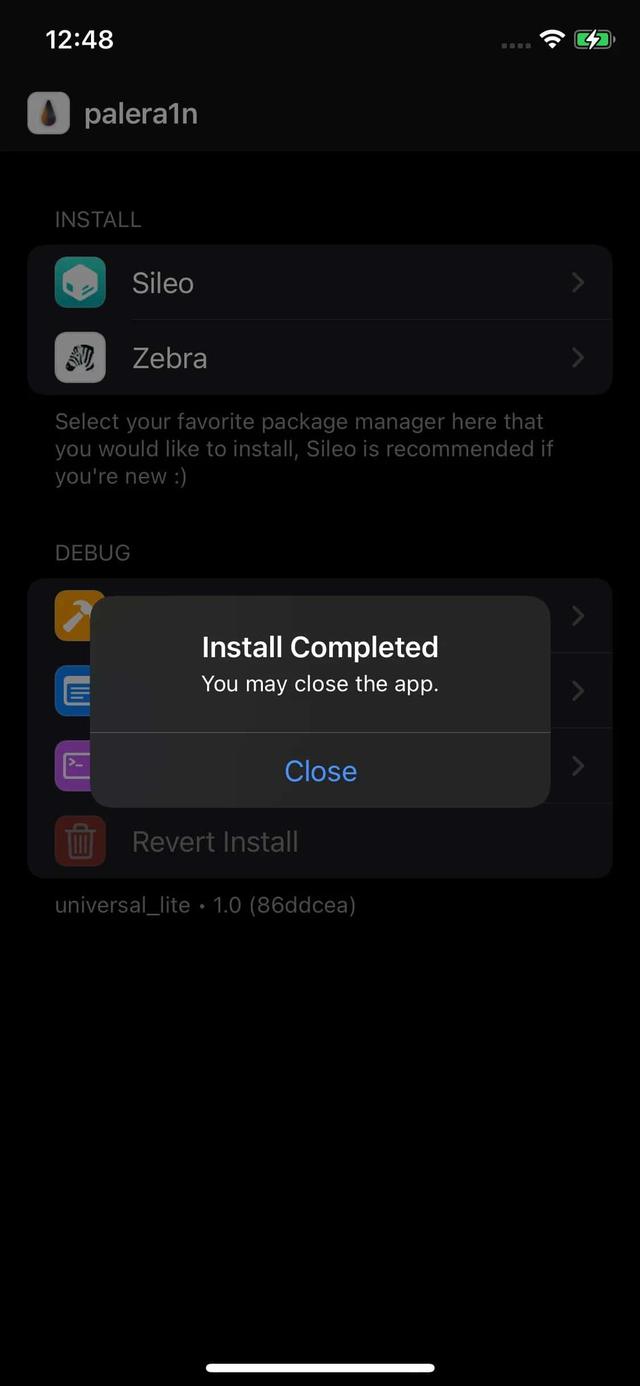
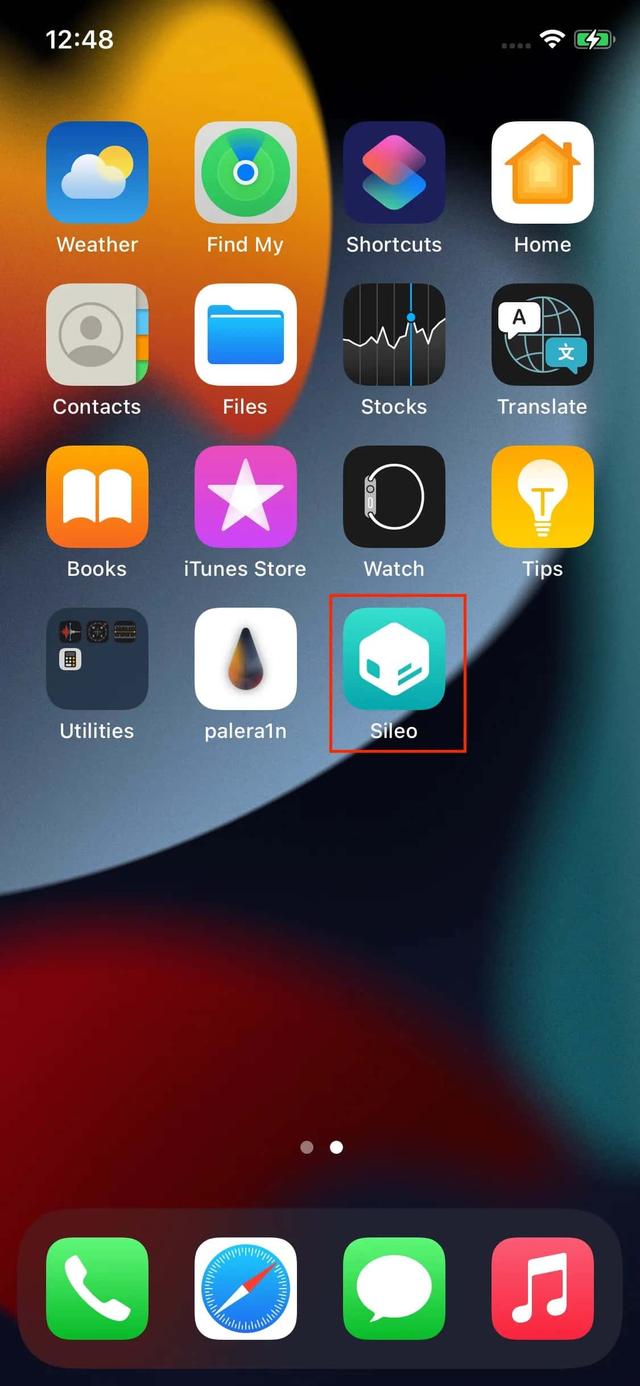
Step #5: Configuring Sileo Packages!
When you have finished with those steps, you can configure Sileo packages as explained in this publication (Introduction to Frida I). Now you are ready to install Frida and all its arsenal of tools!
Step #6: Check the Device Connection Over SSH
The difference between palera1n and other jailbreaks is the use of OpenSSH on a different port. It changes port 22 over to port 44, that’s why you need to use an SSH Tunnel Over USB tool, such as iproxy, but set to run on port 44.
➜  iOS sudo iproxy 22 44
Password:
Creating listening port 22 for device port 44
waiting for connection
New connection for 22->44, fd = 5
Once you have completed those steps,t, you can connect the device over USB using ssh root@IP -pPort or ssh root@localhost. Palera1n, like other JBs, uses the default password “alpine” for the SSH root user. If you want to change it, you can do so by using the command su root.
➜  iOS ssh root@localhost
root@localhost's password: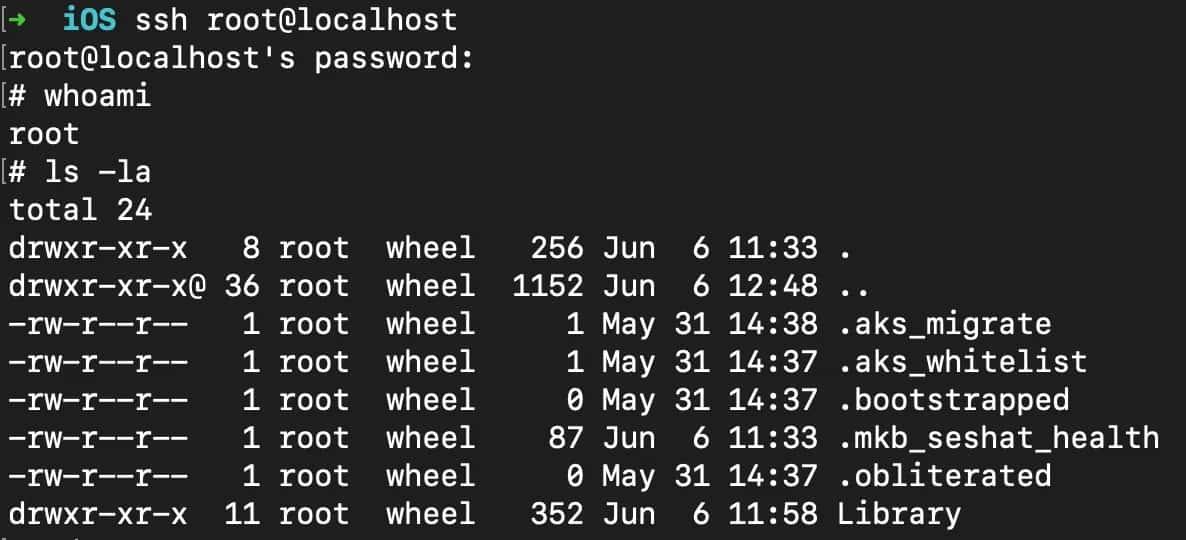
Typical problems performing JB with Palera1n !
- If JB finished the process without the Sileo app installed, you will need to perform the JB again.
- Some devices need to be disconnected and connected after the checkmate process during the JB.
- If you received a “time out message” during the JB process, you can unplug and plug the USB-A/ USB-C wire again.
- If you have an unsupported device, you will have a message similar to this: “<Warning>: Ignoring non-arm64 device…” (Iphone SE 3er generation)
- If your device fails to enter DFU Mode, you will get the message: “<Warning>: Hoops, device did not enter DFU Mode”
- As a tip, we have better results with a USB A cable, you can check that too!
We hope you find this information useful. Happy hacking, and stay in touch for new content related to mobile applications!
Just Mobile Security Team
Try Tungstenic: Next-level mobile application vulnerability protection.
Contact Us
If you need to analyze your application contact us here:
sales@justmobilesec.com | Sales
Any other doubts or questions, don’t hesitate to write to us!
info@justmobilesec.com | Contact
Work with us!