Magisk for Mobile Pentesting: Rooting Android Devices and Building Custom Modules (Part I)
- Published on
Post Date
- Authors

- Name
- Juan Urbano Stordeur
- X
- @juanurss
- Authors

- Name
- Juan Martinez Blanco
- X
- @juan-martinez-blanco

TL;DR: Rooting an Android device allows for system modifications, bypassing restrictions, and performing security testing. This post covers everything from unlocking the bootloader to rooting with Magisk and creating custom modules, including an example module that automates the deployment and management of Frida Server for security assessments.
TL;DR #2: If you don’t know what Magisk is, what it’s used for, how to create or modify a module, or how to root an Android device, this post will guide you through the entire process.

In this post, we will cover the following topics:
- Rooting an Android Device with Magisk
1.1 Unlocking the Bootloader
- What is the Bootloader, and why unlock it?
- Step-by-Step Guide to Unlocking the Bootloader
1.2 Rooting an Android Device with Magisk
- What is Magisk and why do we use it
- Step-by-Step Guide to Rooting with Magisk
- Conclusion
Rooting an Android Device with Magisk
In this section we will explain how to root an Android device using Magisk and the first step to do it is to unlock the bootloader.
Unlocking the Bootloader
What is the Bootloader, and why unlock it?
The bootloader is a security mechanism that ensures that only verified operating systems can be loaded onto a device. By default, most of the Android devices come with a locked bootloader, preventing users from modifying system components. Unlocking the bootloader is necessary for rooting because it allows us to flash custom recovery images and patched boot partitions.
However, unlocking the bootloader has consequences:
-
It wipes all user data.
-
It may void the warranty.
-
Some apps may stop working (RASP solutions may detect bootloader modifications and disable the app from being executed in a tampered device).
It should be noted that, depending on the manufacturer, the bootloader unlocking process may vary. In this case, we will cover the Pixel 6 Bootloader Unlocking.
Step-by-Step Guide to Unlocking the Bootloader
-
Download and install SDK Platform Tools (we are going to use ADB & Fastboot).
-
To enable Developer Mode, Debug Mode and OEM unlocking on your phone:
-
Tap on "Settings".
-
Scroll down to the bottom and tap on "About Phone".
-
Scroll down to the bottom and tap 7 times on "Build Number".
-
Go back to the "Settings" menu and tap on "System".
-
Scroll down to the bottom and tap on "Developer Options".
-
Enable the switches for "OEM unlocking" and "USB debugging".
-
Plug in the device to the computer and open a terminal.
-
Run the following command on your terminal:
$ adb devices- Accept the pop-up on your phone.
Training:~$ adb devices
List of devices attached
23231FDF6005BA device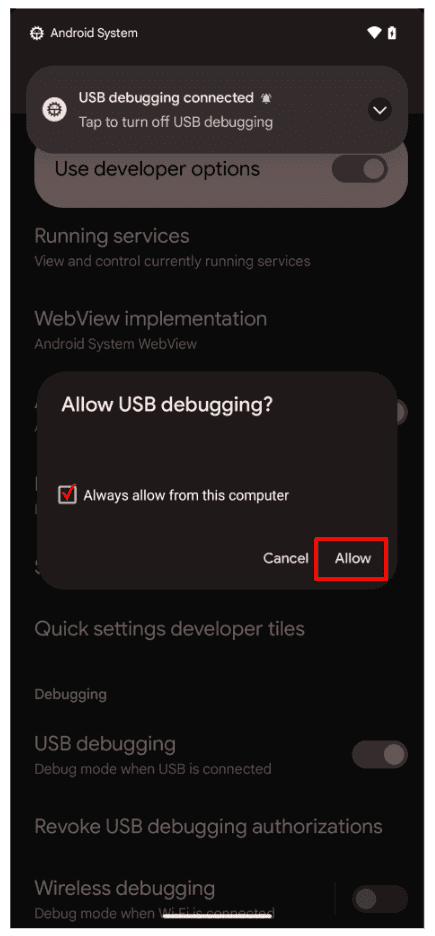
- Run the following command on your terminal to reboot into fastboot mode:
$ adb reboot bootloader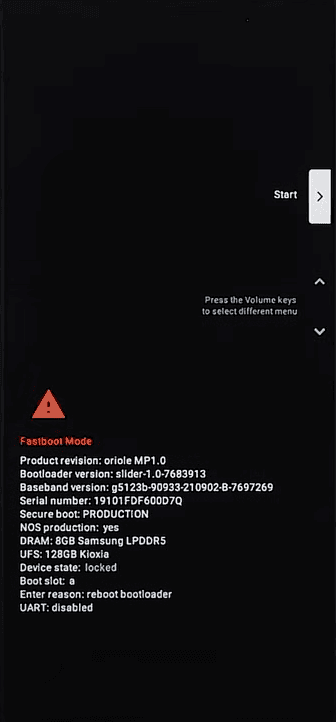
- Run the following command on your terminal to unlock the bootloader:
$ fastboot flashing unlock- On your phone, use the volume keys to select "Unlock the bootloader" and press the power key to confirm.
$ fastboot flashing unlock
                                          OKAY [  0.040s ]
Finished. Total time: 0.041s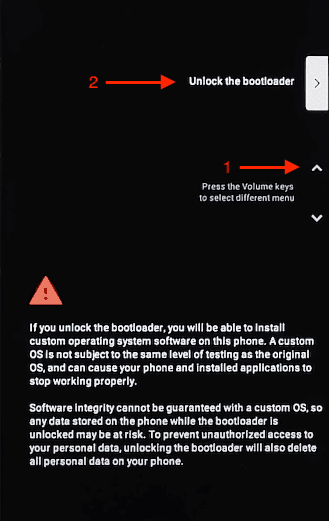
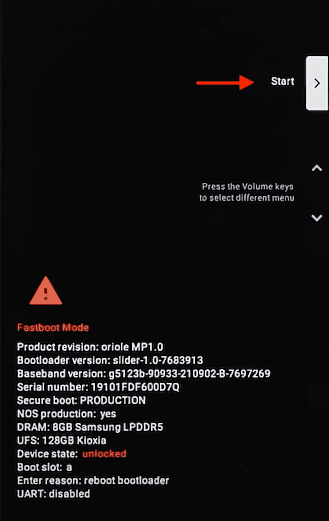
- The bootloader will be unlocked, and you can press the power button to reboot your phone.
Rooting an Android Device with Magisk
What is Magisk and why do we use it?
Magisk is one of the most popular rooting solutions for Android. It allows users to gain superuser privileges on the device while maintaining system integrity through systemless root. Unlike traditional rooting methods that modify the system partition, Magisk applies changes at boot time, and for mobile penetration testing, it’s amazing to make possible the following:
Allows bypassing integrity checks such as Play Integrity and the deprecated SafetyNet, enabling the use of apps that would normally detect a modified device. It also hides root access from sensitive apps, supports the installation of modules to extend functionality, and offers temporary unrooting without permanently modifying system files.
Step-by-Step Guide to Rooting with Magisk
-
Re-enable "Developer Options" and "USB Debugging".
-
Download the Factory Image corresponding to your phone, in this case, "Pixel 6" Oriole 13.0.0 (TQ3A.230901.001.C2, Sep 2023, Verizon, Verizon MVNOs). You can use the command
$ adb shell getprop ro.build.version.releaseto know the release version of your device. If you want to learn more about Android System Properties, you can check our post Bypassing Android Anti Emulation part I in the Android System Properties validations section.
- Unzip the image oriole-tq3a.230901.001.c2-factory-fa5562f1.zip and unzip the file inside of it called "image-oriole-tq3a.230901.001.c2.zip". Inside, there is a file called "boot.img" and another file called "vbmeta.img".
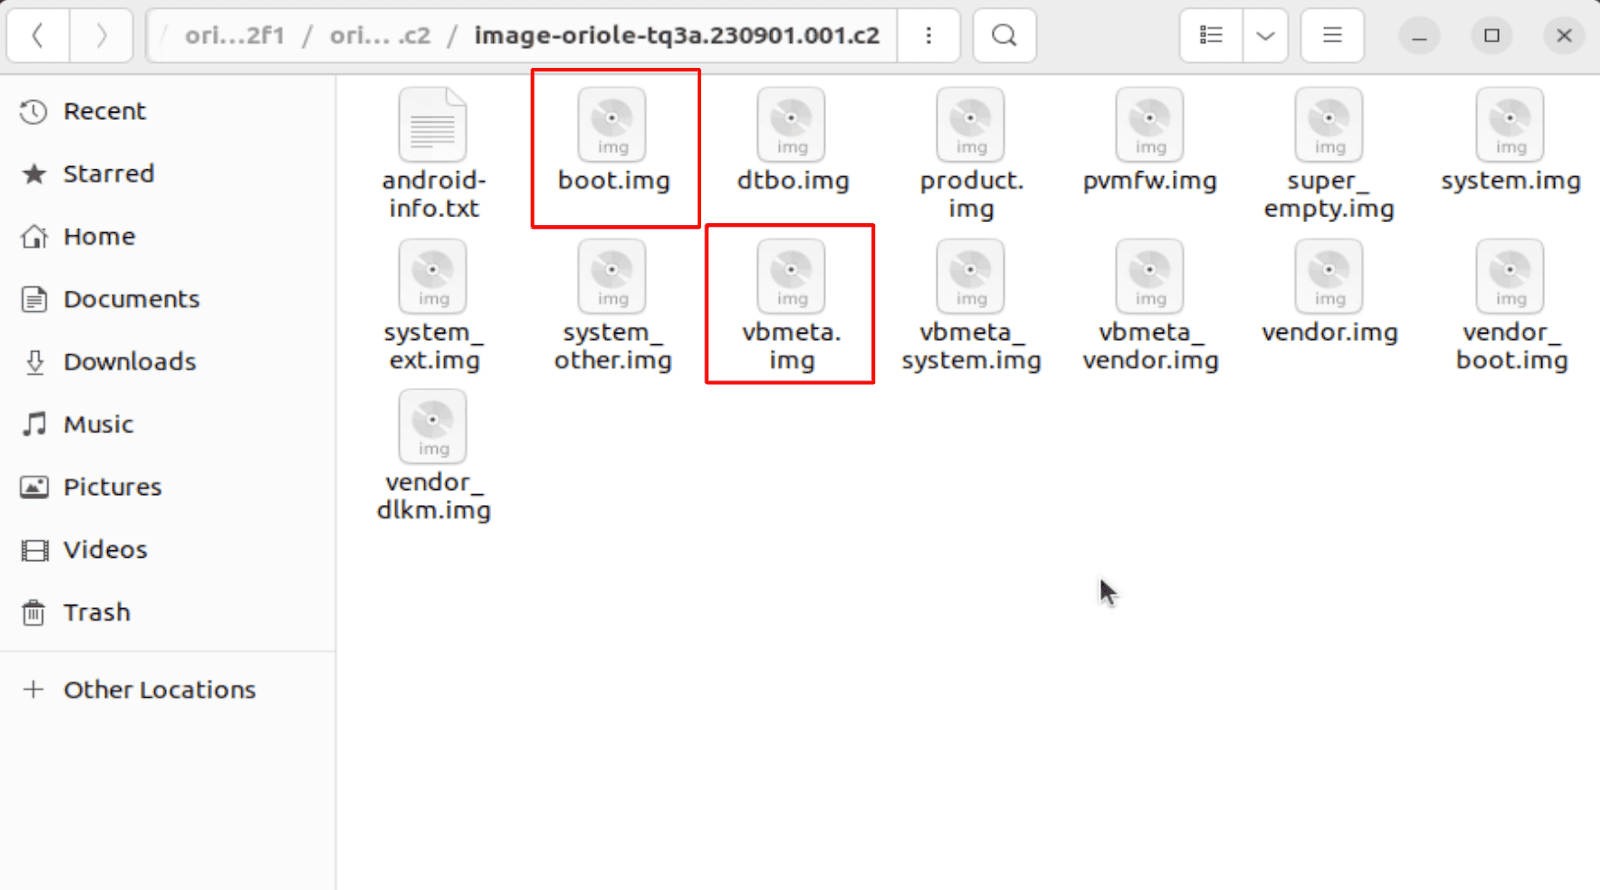
- Upload "boot.img" file into your phone with the following command:
$ adb push boot.img /sdcard/Download/
-
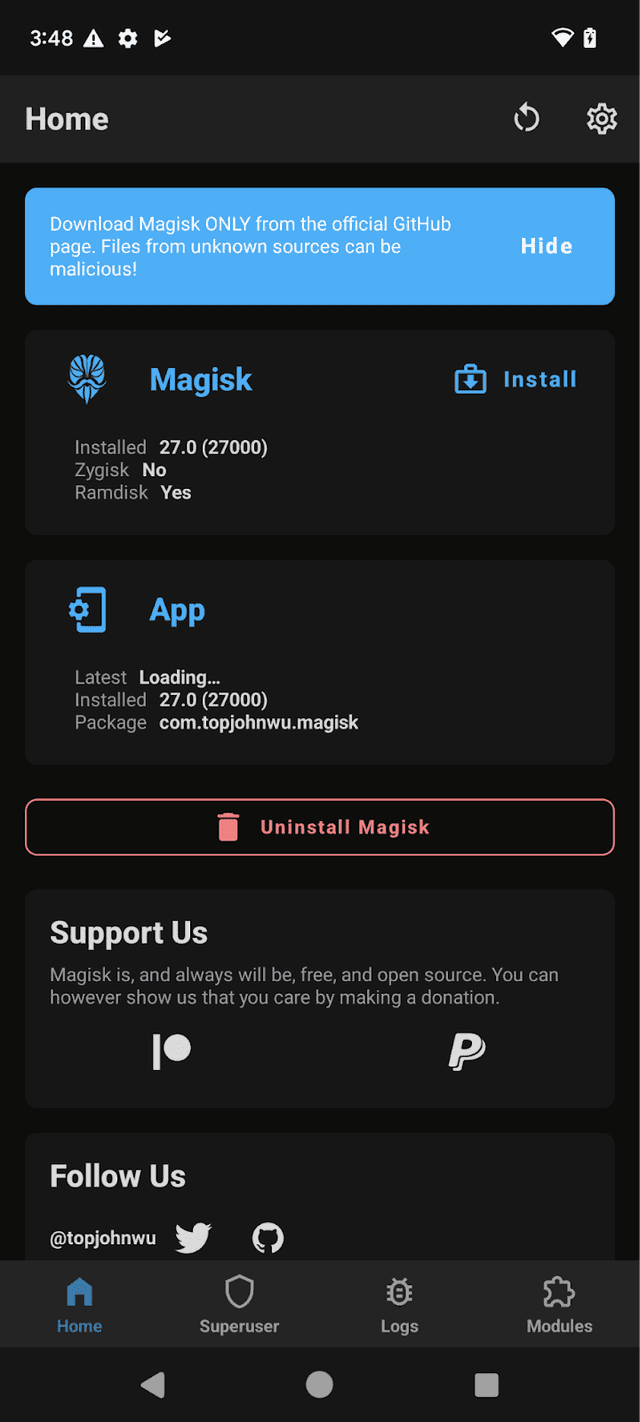
On your phone, download and install the Magisk Manager Application.
-
Open the Magisk application and tap on the "Install" button of the "Magisk" box.
-
Tap on the "Select and Patch a File" option, select the "boot.img" file previously transferred to the phone, and tap on "Let’s Go".
-
Magisk will create a patched version of the "boot.img" file inside the Download folder.
-
Let’s download the patched file with ADB:
$ adb pull /sdcard/Download/magisk_patched-27000_fbYlr.img
- Let's run again the following command on your terminal to reboot into fastboot mode:
$ adb reboot bootloader- Let's disable verification and verify using the following fastboot command on the terminal:
$ fastboot flash - disable-verity - disable-verification vbmeta vbmeta.img
- Now, let's flash our patched image file using the following command on the terminal:
$ fastboot flash boot magisk_patched-27000_fbYlr.img- Reboot your phone using the power button.
Note: if an infinite loop takes place during the boot process, a factory reset must be done and the process repeated.
-
Once the device has been rebooted, open the Magisk application and the phone will reboot once more.
-
Now your phone is rooted, and you can continue to install the burp certificate to be able to capture traffic, install Frida and different modules that are handy to bypass protections and more.

Conclusion
As we've seen in this post rooting an Android device could involve a lot of steps and some of them may differ between devices and manufacturers, we actually covered how to root Google Pixel smartphones but other manufacturers may need additional steps, even though the process is extensive its easy to follow and could help us as security researchers or mobile pentesters to have a device with root access which gives us the chance to install and uninstall different modules and implement configurations and revert them without major efforts when facing a mobile security analysis.
We reviewed all the steps involved in the rooting process from unlocking the bootloader and patching and flashing the boot.img file, in the Part II of this post we are going to deep dive into the process of creating a custom Magisk module in which we will create and share with the community a module to automate the downloading, updating and launching of Frida Server.
For more details, visit the official Magisk repository: Magisk GitHub
Just Mobile Security Team
Try Tungstenic: Next-level mobile application vulnerability protection.
Contact Us
If you need to analyze your application contact us here:
sales@justmobilesec.com | Sales
Any other doubts or questions, don’t hesitate to write to us!
info@justmobilesec.com | Contact
Work with us!